Instructions for Windows 7
STEP 1: Make sure the wireless card is enabled on your laptop. There are two settings that could cause your wireless card to be disabled:
- Most laptops have a button to disable/enable the wireless card—when enabled the button will usually be lit.
- If you are not able to connect to wireless networks, then there is a chance that the Windows operating system might have disabled your wireless network card. Here are the steps to check if your wireless network card is disabled by the Windows 7 operating system:
- Click Start > Control Panel > Network and Internet > Network and Sharing Center > on the left side, under Control Panel Home, click on Change adapter settings.
- Look for the Wireless Network Connection icon, if the line underneath shows “Disabled“, then right-click on your wireless network card and select “Enable”.
STEP 2: Browse the available wireless networks by moving your mouse cursor over the wireless connection icon ![]() on the bottom-right corner of your laptop screen, a small box will appear that says “Not connected – Connections are available”. Now click on the wireless connection icon
on the bottom-right corner of your laptop screen, a small box will appear that says “Not connected – Connections are available”. Now click on the wireless connection icon ![]() and a list of wireless network connections will be displayed as shown in the screenshot below.
and a list of wireless network connections will be displayed as shown in the screenshot below.
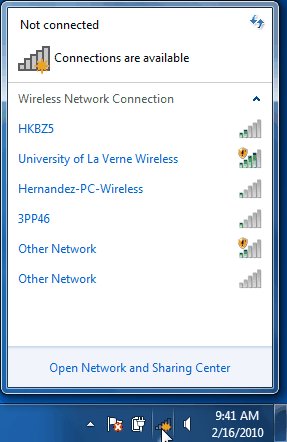
STEP 3: Select “University of La Verne Wireless”. You can check Connect automatically so your laptop can automatically connect to the “University of La Verne Wireless” network when it is within range. Then click on the Connect button.
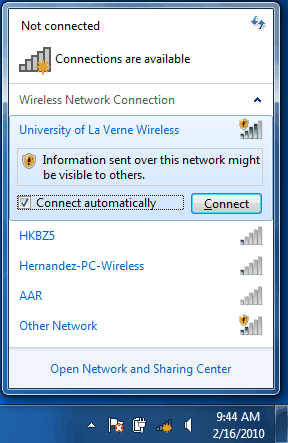
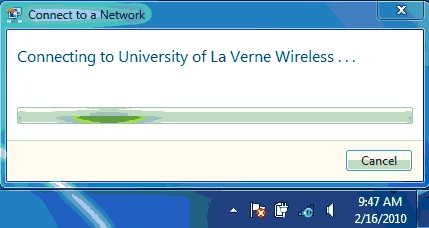
STEP 4: A window will appear showing that you are connecting to the “University of La Verne Wireless” network.
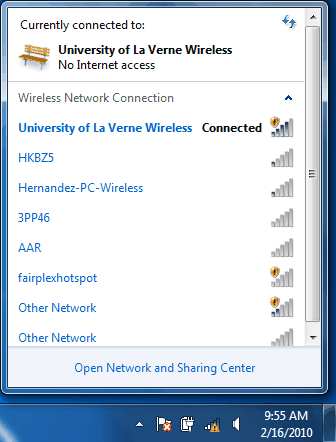
STEP 5: If you click on the wireless connection icon on the bottom-right corner of your laptop screen, a window similar to the one below will be displayed stating that you are currently connected to”University of La Verne Wireless”. Notice the yellow exclamation point next to the word “Connected”; this indicates that you need to log in to access the Internet.
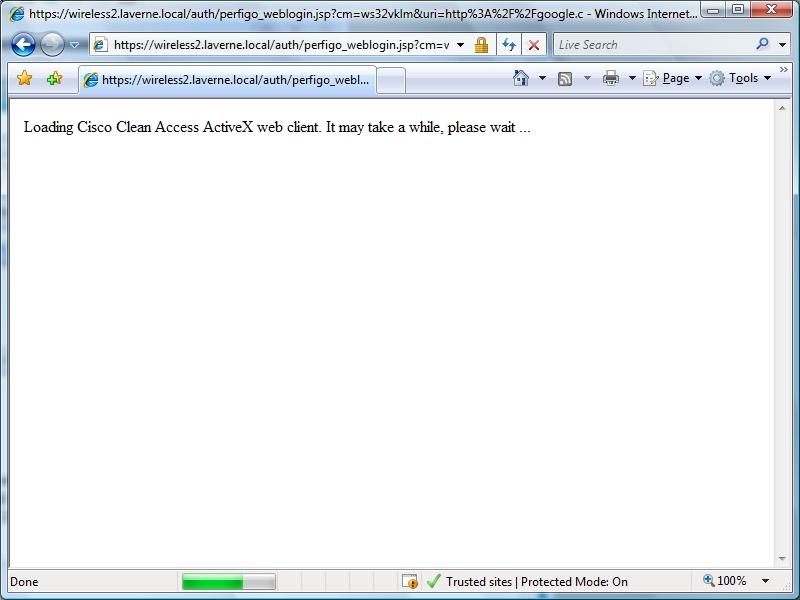
STEP 6: Open a web browser so your laptop can go through the Network Admission Control process. If your browser does not automatically go to a default web page, please type in any website address. Your web browser will automatically be redirected to the Network Admission Control login page. There are some minor differences in the Network Admission Control process between using the Internet Explorer and Mozilla Firefox web browsers–the differences are mentioned below.
Internet Explorer users will see this screen (the Network Admission Control system uses ActiveX technology for Internet Explorer).
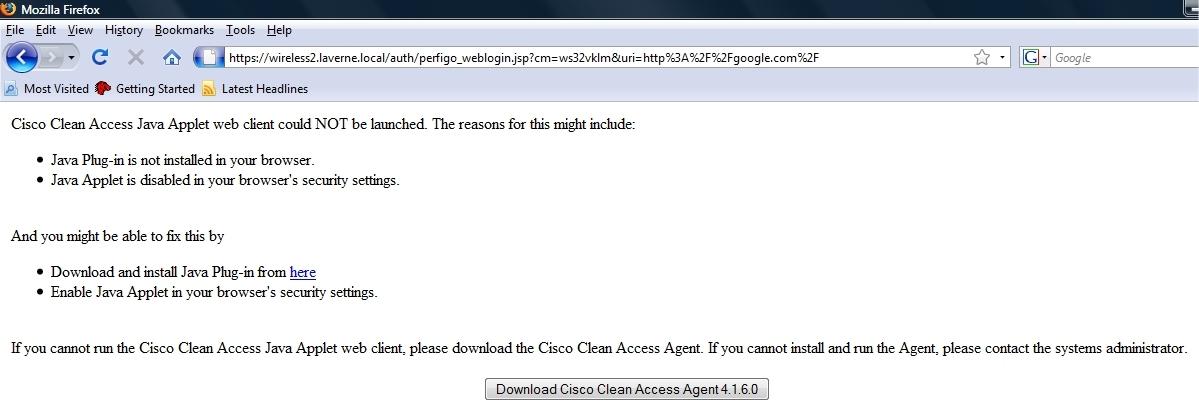
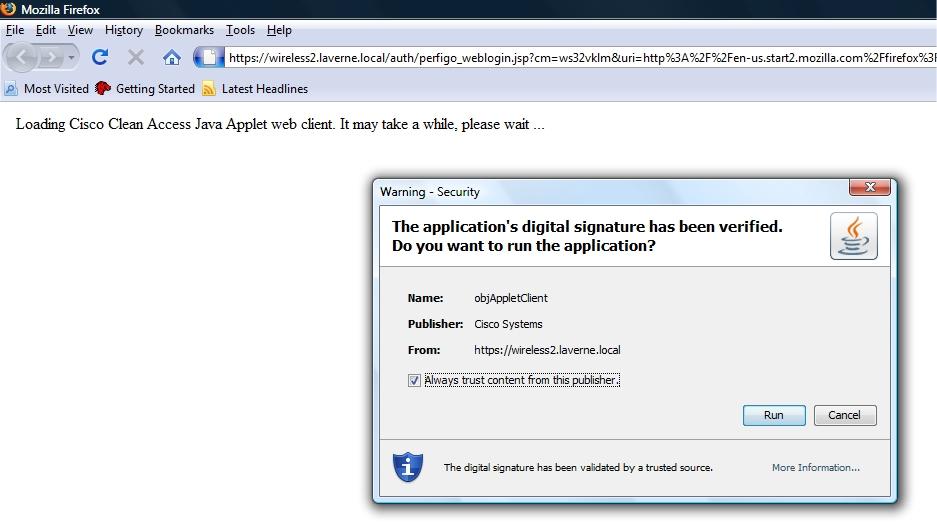
For Mozilla Firefox users: if you get this screen (first screenshot below), click on the Download and install Java Plug-in from here link (it is recommended to not click on the Download Cisco Clean Access Agent 4.7.2.5 button). When you have installed the Java Plug-in, make sure to close your Mozilla Firefox browser and open it again to allow the Java Plug-in to take effect. After you have restarted your web browser, you will see the second screenshot below, click on the Run button. Note: the Network Admission Control system uses Java technology for Mozilla Firefox.
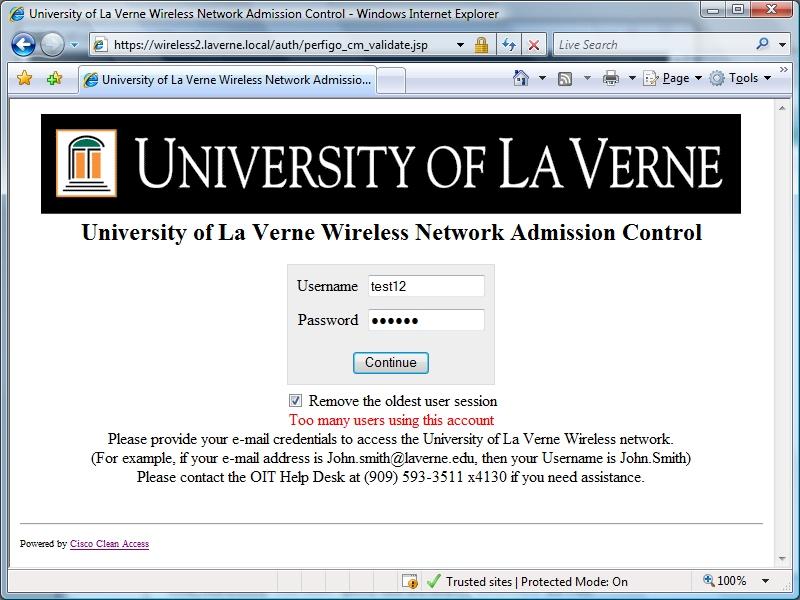
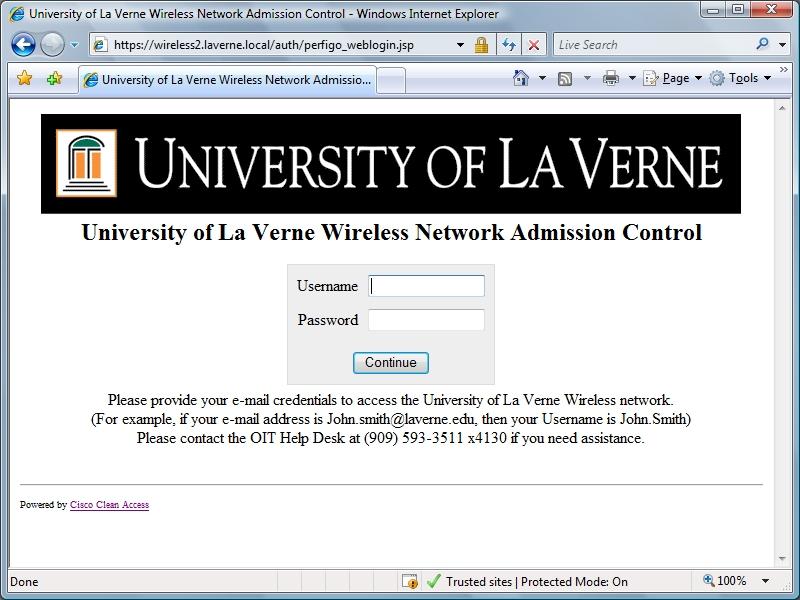
STEP 7: You should now see the Network Admission Control login page. Enter your University of La Verne e-mail username and password and click on Continue. For example, if your e-mail address is john.smith@laverne.edu, then enter john.smith in the Username box.
Also, if you see Too many users using this account (shown in the second screenshot below), check the box Remove the oldest user session and click Continue.
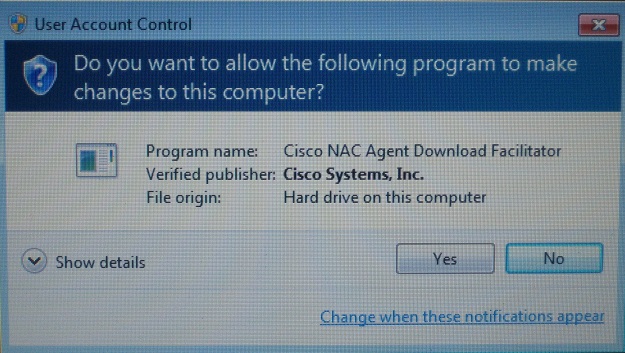
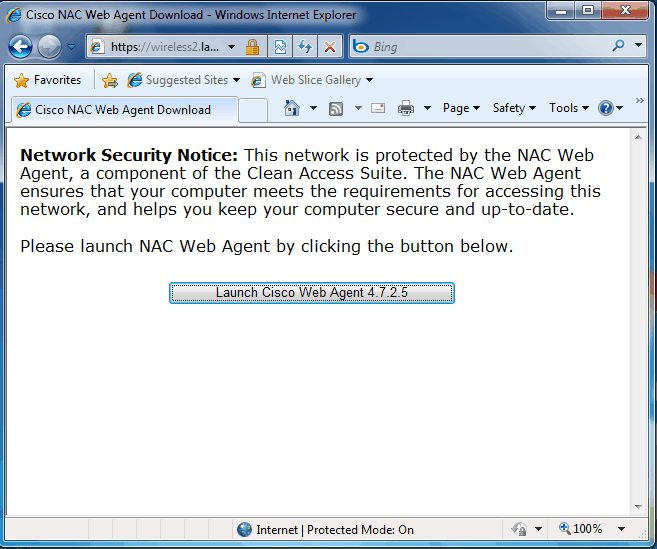
STEP 8: Click on the Launch Cisco Web Agent 4.7.2.5 button as shown in the first screenshot below. You might get a pop-up window with the header User Account Control and the program listed is Cisco NAC Agent Download Facilitator as shown in the second screenshot below–click on the Yes button.
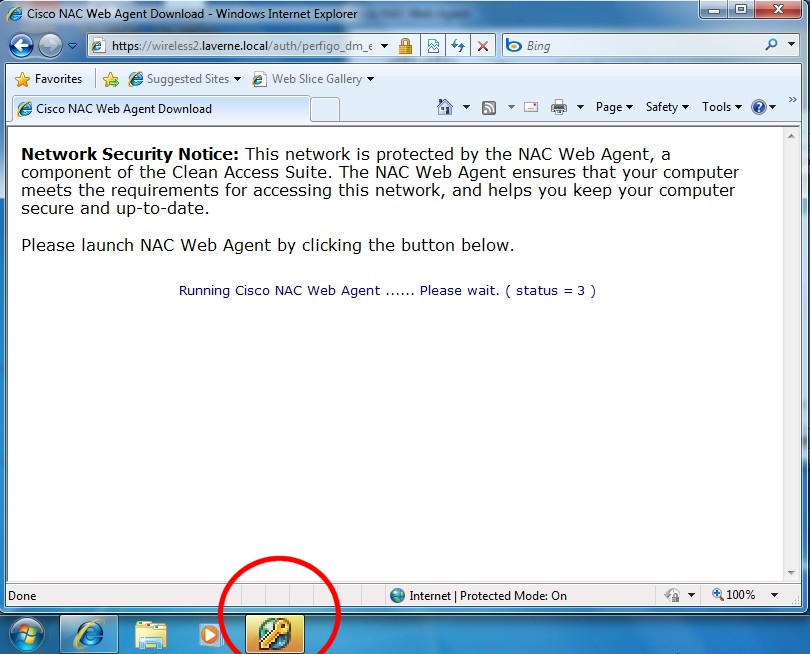
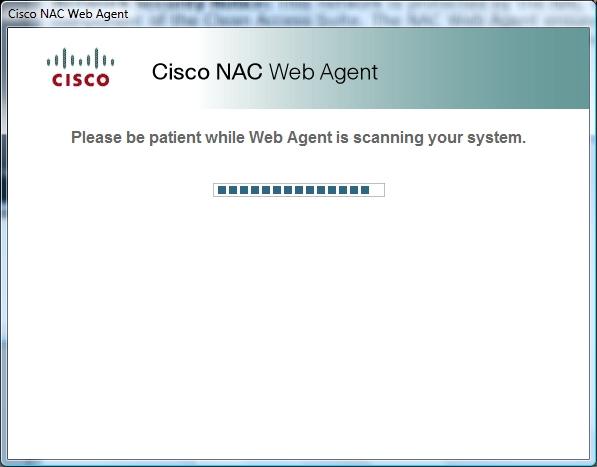
STEP 9: You should see the screenshot below–if not, check the taskbar at the bottom of your screen and click the flashing taskbar button as shown in the second screenshot below. Proceed to the next step.
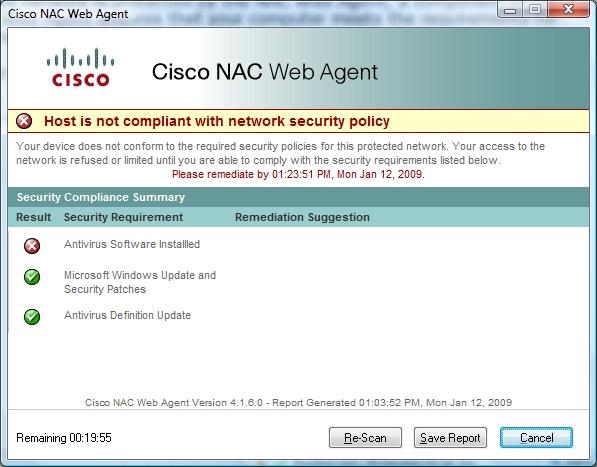
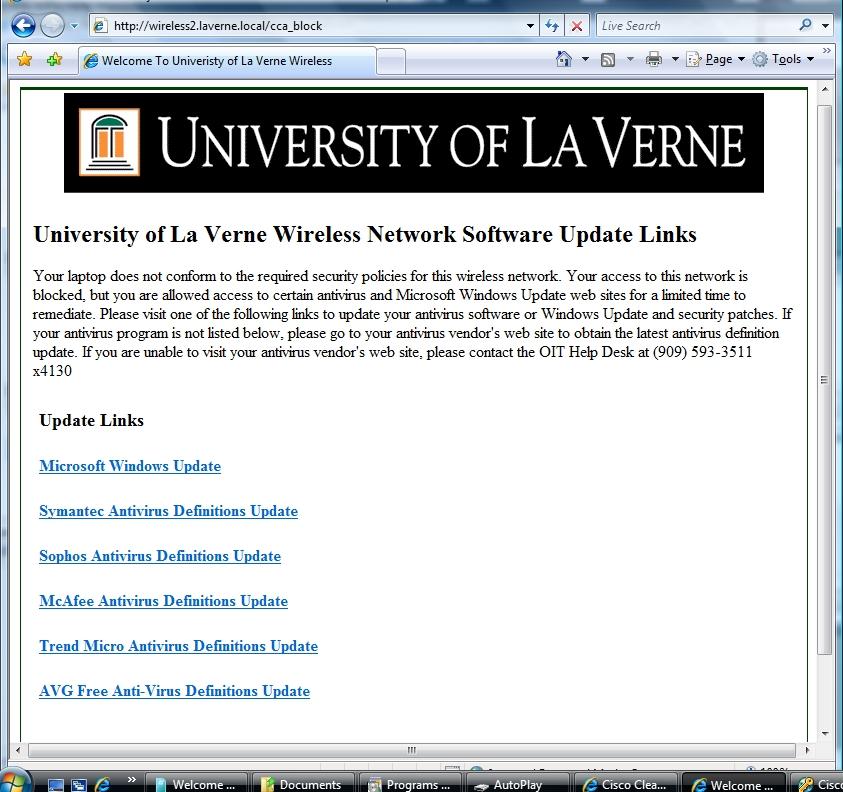
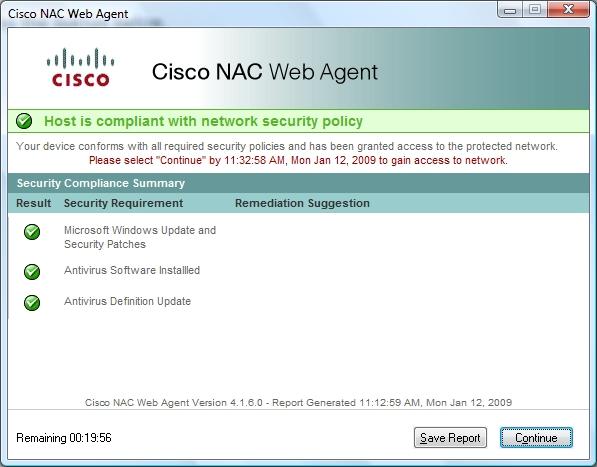
STEP 10: If your laptop has up-to-date antivirus software and Windows security patches, and you see the three green checkmarks like the first screenshot below, click Continue, and go on to Step 11. Otherwise, if one of the Security Requirements did not pass (see an example in the second screenshot below) you will be given a limited amount of time to access certain websites (shown in the third screenshot below) to download antivirus definition updates and Microsoft Windows Update and security patches (go to any website within your web browser and you will automatically be redirected to that web page). Once you have downloaded and installed the antivirus and/or Windows patches, click on the Re-Scan button (shown in the second screenshot below).
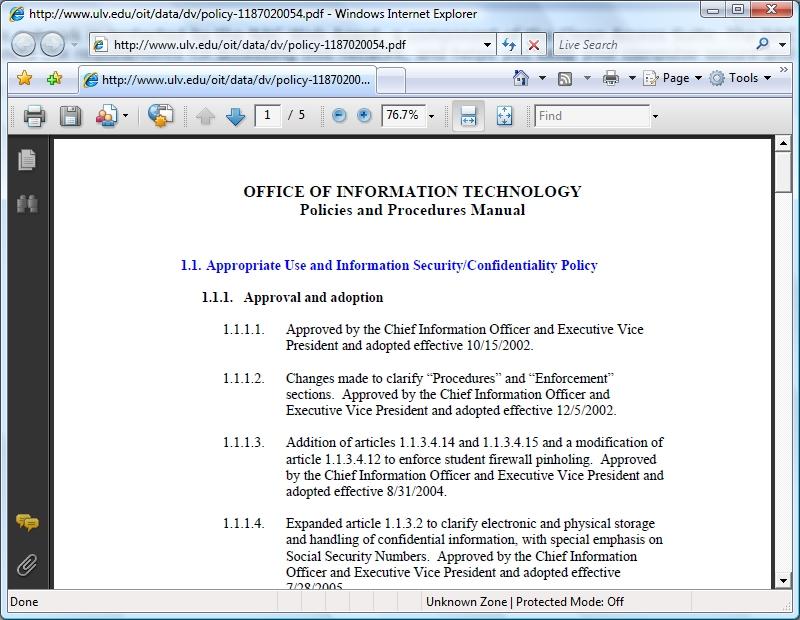
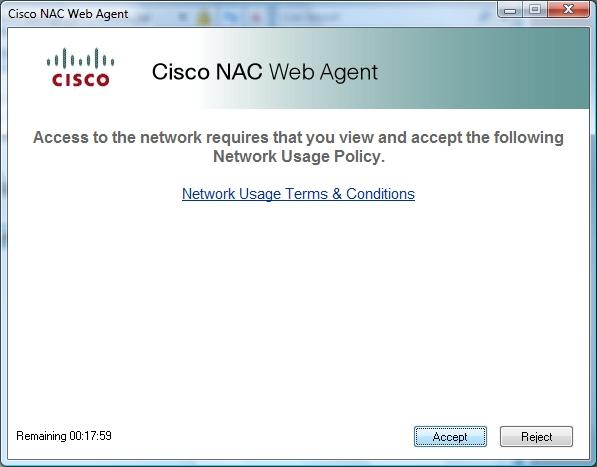
STEP 11: Click on the link Network Usage Terms & Conditions to review the University of La Verne network policies. Note: your laptop needs to have Adobe Acrobat Reader installed to view the policies. If your laptop does not have Adobe Acrobat Reader, then please click here to get the program (which is free).
When you are done reviewing the policies, close the window and click the Accept button if you agree to abide by the policies.
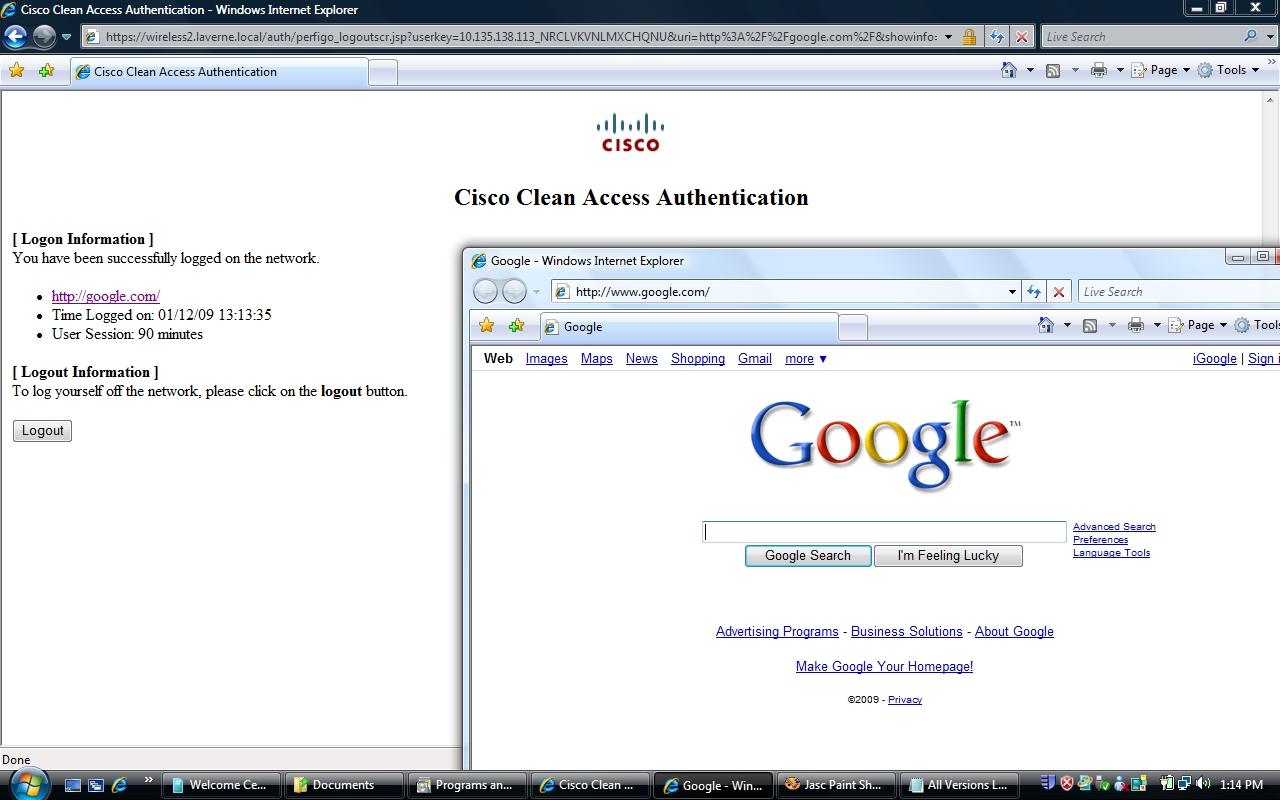
STEP 12: Congratulations, you are now connected to University of La Verne Wireless network, a status windows shows the status of your connection. If pop-ups are enabled for your web browser, a new window will appear with your original requested website–otherwise click on the hyperlink to browse websites (for example, http://google.com is the hyperlink listed in the screenshot below). When you are done accessing the wireless network, click on the Logout button.
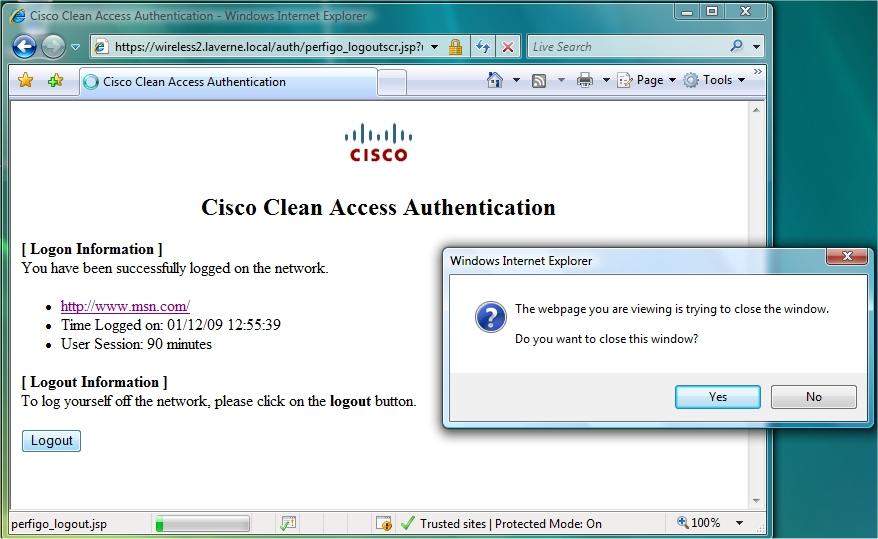
STEP 13: When you clicked the Logout button from the previous step, a pop-up window will appear as shown in the screenshot below; click on the Yes button to close the window to end your session.
Need Help?
If you have any problems, please contact the Unified Service Desk at (909) 593-3511 x4130
