Instructions for Windows XP (for Regional Campuses)
STEP 1: Make sure the wireless card is enabled on your laptop. There are two settings that could cause your wireless card to be disabled:
- Most laptops have a button to disable/enable the wireless card—when enabled the button will usually be lit.
- If you are not able to connect to wireless networks, then there is a chance that the Windows operating system might have disabled your wireless network card. Here are the steps to check if your wireless network card is disabled by the Windows XP operating system:
- Click Start > Control Panel > Network and Internet Connections > Network Connection s (this is listed under “or pick a Control Panel icon” on the lower half of the screen).
- Look for the Wireless Network Connection icon, if the line underneath shows “Not Connected” or “Connected“, then your wireless network card is already enabled, but if it shows “Disabled“, then right-click on your wireless network card and select “Enable”.
STEP 2: Browse the available wireless networks by moving your mouse cursor over the wireless connection icon on the bottom-right corner of your laptop screen and click on the pop-up balloon.

STEP 3: Select “University of La Verne Wireless” and click on the Connect button.
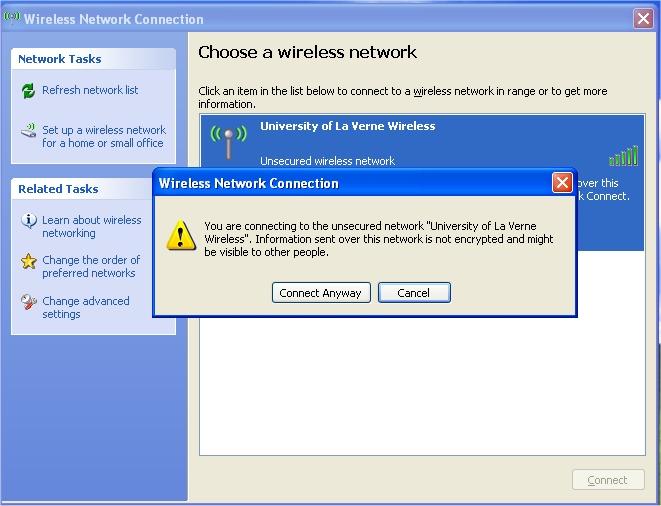
STEP 4: If you see the pop-up window as shown below, click on the Connect Anyway button.
STEP 5: Your laptop should now be connected to the University of La Verne Wireless (notice the word “Connected” shown in the screenshot below)
t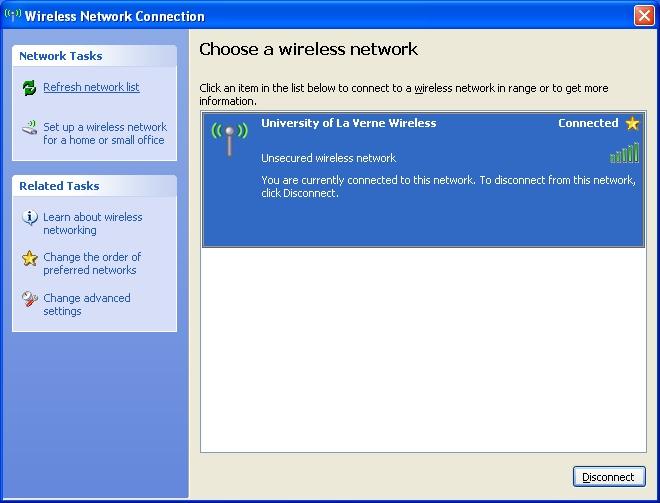
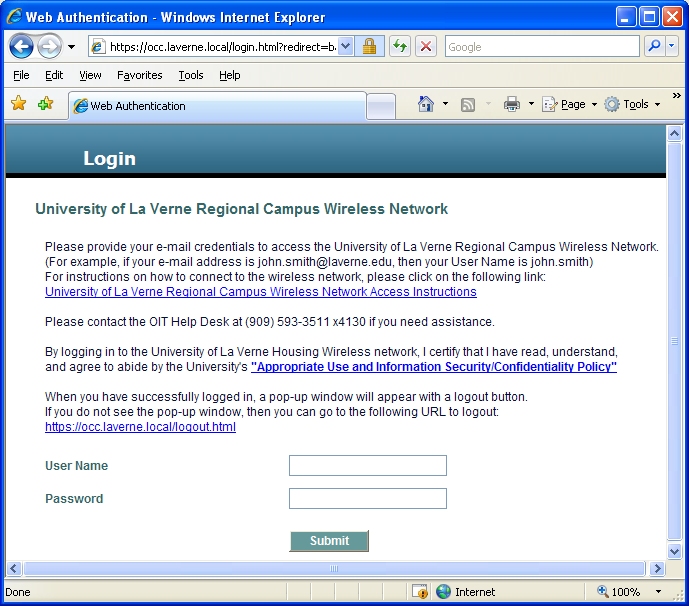
STEP 6: Open a web browser so your computer can go to the Login web page. If your browser does not automatically go to the Login web page, please type in any website address and press Enter.
Enter your University of La Verne e-mail username and password and click on Submit. For example, if your e-mail address is john.smith@laverne.edu, then enter john.smith in the User Name box.
STEP 7: When you have successfully logged in, a pop-up window will appear with a Logout button. If you do not see the pop-up window (your web browser might be set to block pop-ups), then you can go to the URL mentioned in the last paragraph on the login page (in the example shown in the previous step, the URL shown on that login page was https://occ.laverne.edu/logout.html — please note that each ROC site will have a different URL to log out ).
Your computer will stay logged in up to 3 hours (unless you log out by clicking the Logout button on the pop-up window or if you go to the URL specified on the login page to log out).
Note: you can be logged in on up to one computer on the wireless network at the same time with the same e-mail username–if you are already logged in in on a computer, and you try to login on a second computer using the same e-mail username, you will not be able to log in on that second computer (and no error message will appear).
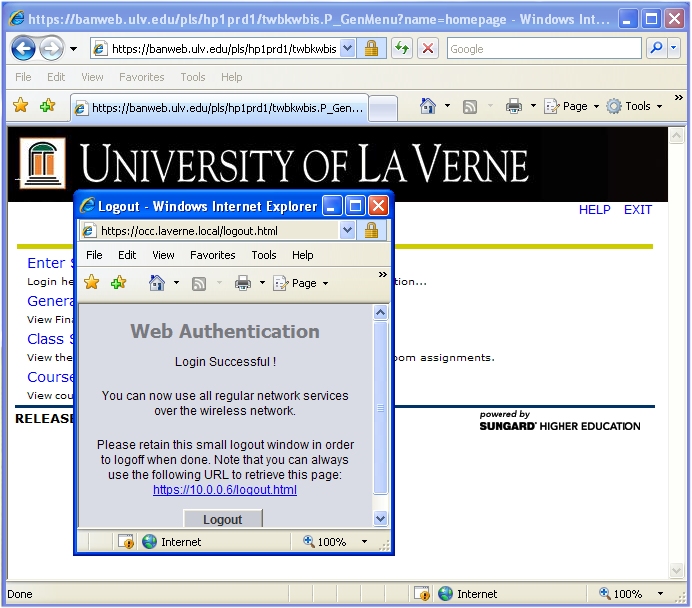
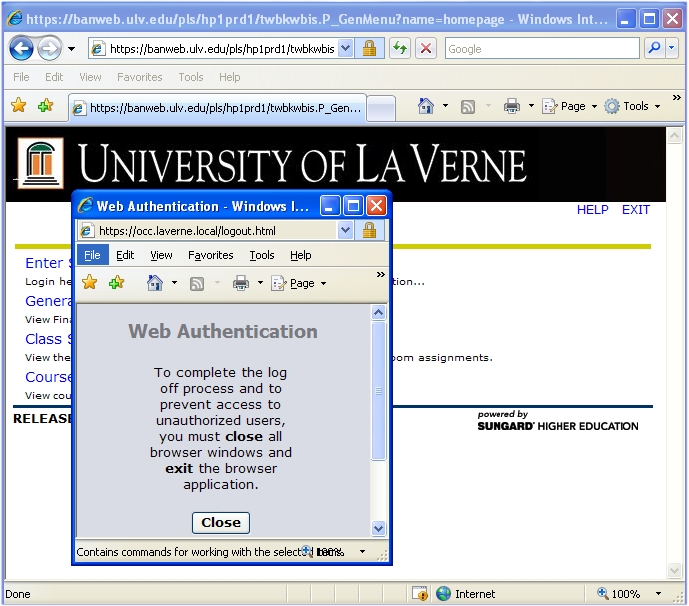
STEP 8: When you click the Logout button, you will get a message shown in the screen shot below. As the message states–to complete the log off process and to prevent access to unauthorized users, you must close all browser windows and exit the browser application.
Need Help?
If you have any problems, please contact the Unified Service Desk at (909) 593-3511 x4130